Adding an image to a document can help to make your meaning clear, but you must make sure any images you add are relevant and enhance your writing. Here, we’ll look at how to add and edit images in Google Docs.
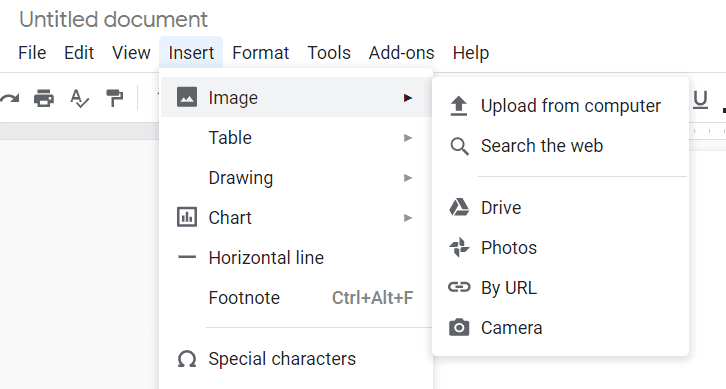
To add an image to a document in Google Docs:
This will add the image in the place selected.
In terms of the sources available, your options are:
You can also drag and drop or copy and paste an image into a document.
To delete an image in Google Docs, meanwhile, simply right click it and select Delete from the contextual menu.
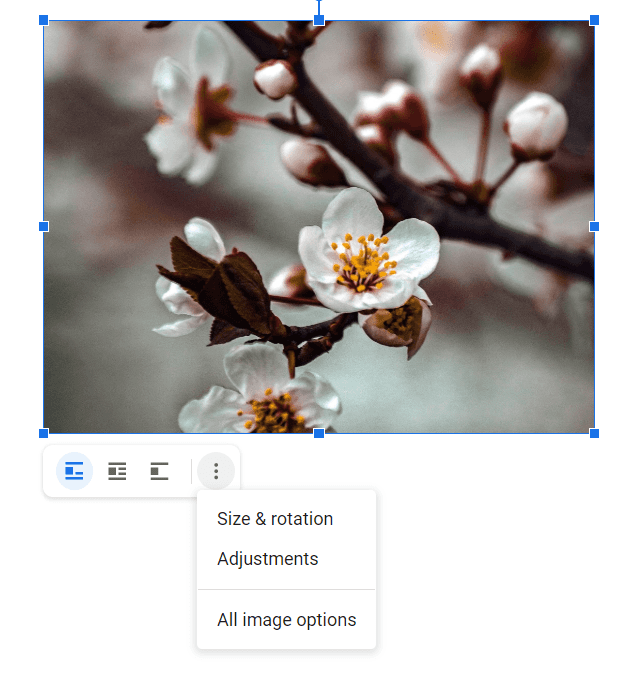
To edit your image in Google Docs, first select it. You will then see some common formatting options below the image.
Subscribe to our newsletter and get writing tips from our editors straight to your inbox.
The text wrapping settings here change how your image is positioned in relation to your text. In Google Docs, you can choose:
You can also access other formatting options here. To see these, click All image options in the menu shown above or right click the image and select Image Options. This opens a sidebar with five sections:
You can use these settings to customize your image as required. And if you decide you preferred the original image, you can undo all your changes by clicking Reset at the bottom of the image options sidebar or right clicking the image itself and selecting Reset Image from menu.
If you have an image in a document and you want to replace it, you can do this quickly using the Replace image option. To do this:
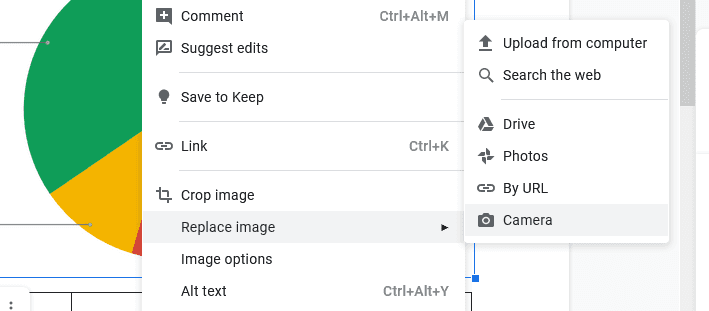
The image will then appear in the same position as the old one.
Hopefully, you now feel confident about adding and editing images in Google Docs. But if you’d like any further help with proofreading or formatting your work, don’t forget that Proofed has editors available 24/7.